maprys.net
build an ergodox keyboard
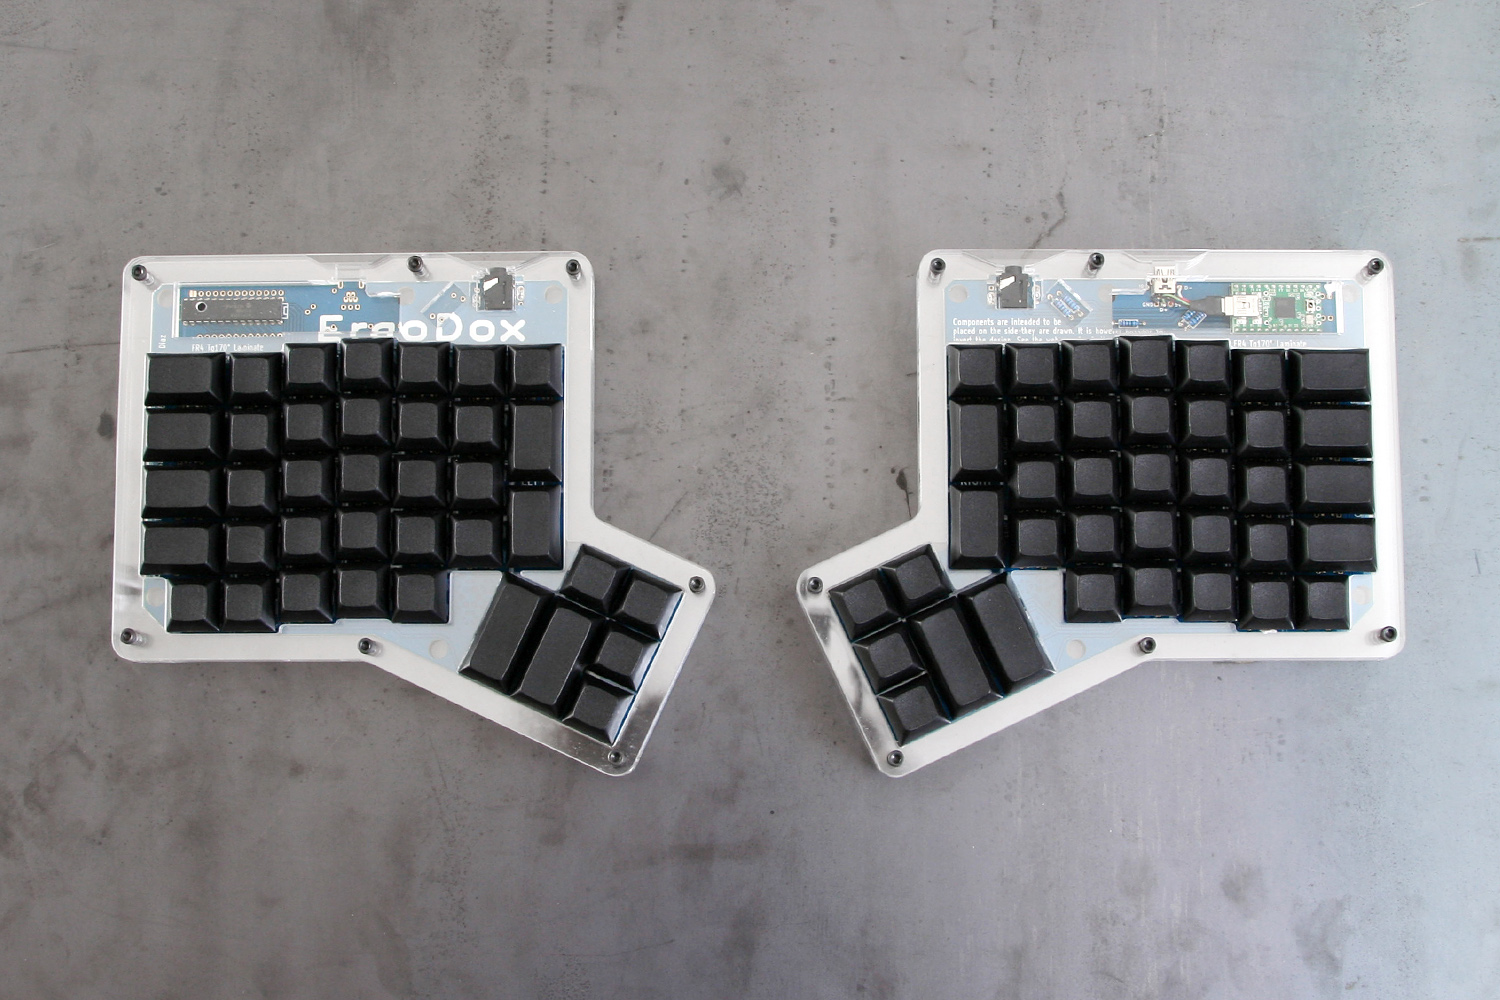
(last modified 11 Sep 2022)Roughly a year ago, I decided to step into a hardcore corner of mechanical keyboards. I had grown fond of the mechanical switch click, the solid feel of a keyboard, and the myriad of keycaps available for customization. It was time to take my relationship with mechanical keyboards to the next level: I wanted to build my own. Enter the ErgoDox: an open-source, split layout, vertically ortholinear, fully programmable keyboard. That’s a heck of a mouthful, but let’s break all that down.
Open-source means that the designs of this keyboard are available to the general public at no charge. Anyone can use these designs to build their own keyboard, modify the designs, or redistribute them freely.
Split layout refers to a growing design in keyboards where the layout of the keys are split into left and right halves. This allows for the key arrangement to be placed at angles less stressful to the wrists and arms. There are other keyboards that utilize split layouts like the TEK Keyboard and the Kinesis Advantage.
Ortholinear describes the keys being in line with one another either vertically, horizontally, or both. The ErgoDox has vertically ortholinear arranged keys, meaning the keys are lined up in columns as opposed to rows like the standard keyboard. A standard keyboard that most people are familiar with is horizontally ortholinear.
Programmable. Keyboards need software to communicate with the computer, but usually the software on keyboards isn’t customizable. The ErgoDox’s software is available on Github. That makes it possible for you to move keys around if you don’t like where they are by default. You can make keys do more fancy things rather than just sending a letter to the computer. This allows you to tailor the operation of the ErgoDox to your liking with very few limits: a tinkerer’s delight!

Parts & Construction
The quickest and least expensive way to acquire parts for an ErgoDox is to find them yourself using the official parts list. Another avenue, if you’re more patient, is to purchase a kit from Massdrop when they become available every six months or so. The Massdrop kit has been wildly popular as it comes with all parts needed to assemble an ErgoDox. There was an Indiegogo a while ago for fully assembled ErgoDox boards that added some interesting fold out legs to the original design, but I believe it has since ended. You’ll need a good soldering iron, some wire cutters/strippers, and intermediate soldering skills.
The building process was straight forward. Nothing that someone with basic DIY electronics skills couldn’t handle. Massdrop provides instructions that detail the process along with high-quality pictures. I took my time during the build which ended up taking me about 10 hours, but based on your skills you can probably do it quicker. The most difficult task I encountered was soldering the surface-mount diodes to the PCB due to their small size, and soldering the USB mini cable ends to the board. Be sure to test all the switches before you do the final assembly! I initially had three keys that didn’t work because of bad solder joints.
Configuration
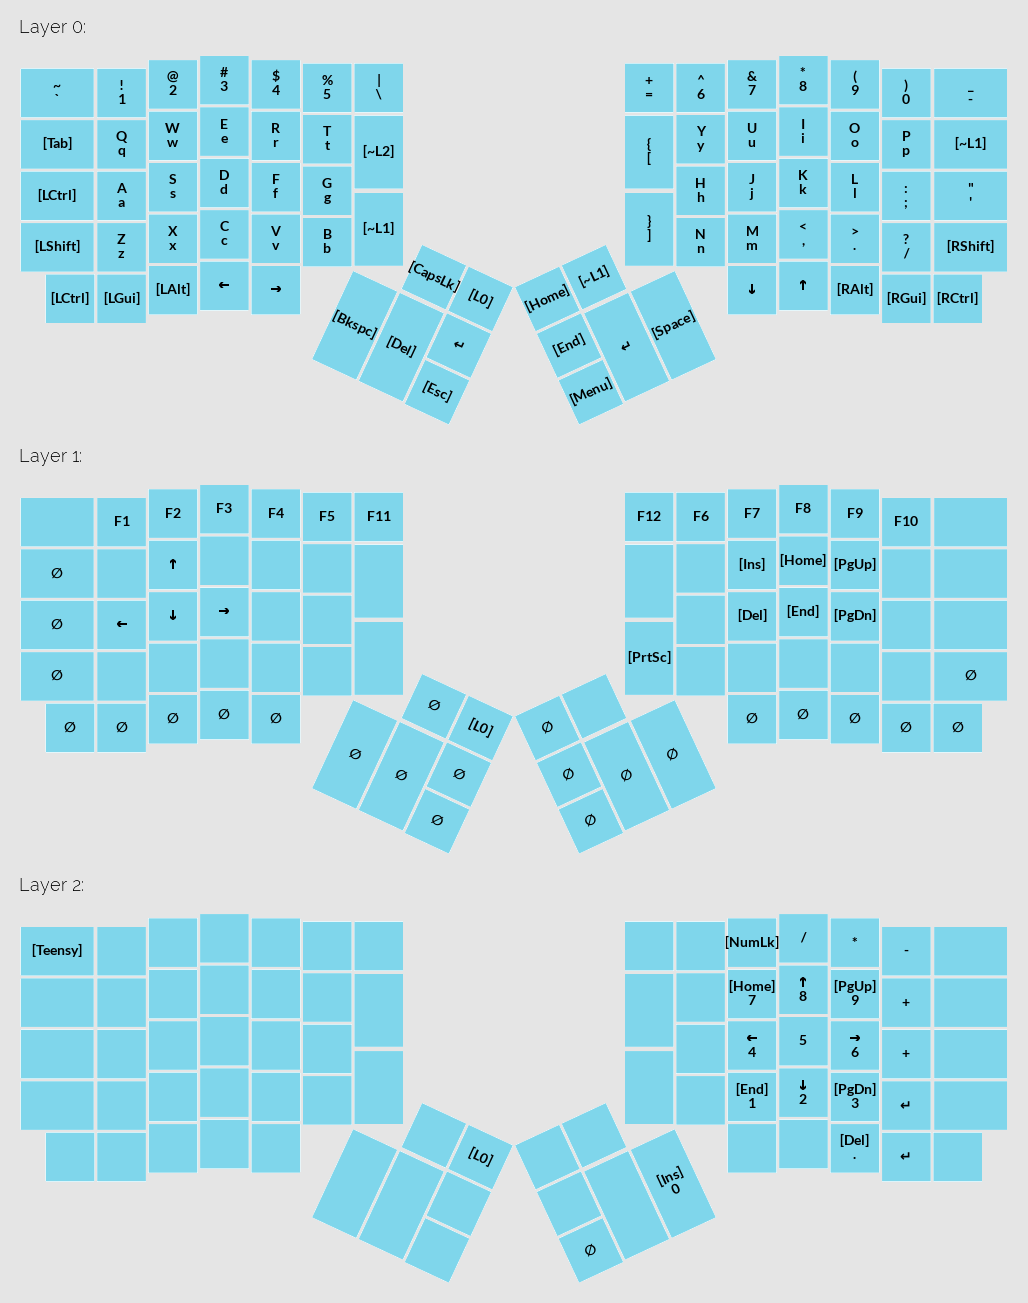
After completing construction and ensuring all the ErgoDox’s switches are operational, then comes choosing your key layout. The easiest method is to use Massdrop’s ErgoDox Configurator to setup your keys and layers. The ErgoDox software operates using a concept of layers on a stack. There is always a currently selected layer. Modifier keys can be used to switch between layers.

How is this useful? The idea behind this is so that you can do more things with the same keys. For instance, I use Home, End, Page Up, and Page Down often, but there isn’t particularly an easy-to-reach place for them on the default layer, Layer 0. I place those keys on Layer 1 using the same physical keys as I, K, O, and L, respectively. In the image of my ErgoDox layout above, you’ll see that I can hold down [~L1] (near the left index finger) switching to Layer 1 making Home, End, Page Up, and Page Down accessible under my right hand. Now I don’t have to stretch my hands to find those keys if I put them in an out-of-the-way place on the default layer.
Usage
I know this all sounds pretty weird. It certainly was for me when I first used the ErgoDox. Maybe it even sounds bad, but don’t worry! It gets much much better after about two weeks. I never timed my typing before switching to the ErgoDox, so I can’t confirm speed improvements. I must confess that I do prefer the ErgoDox, not simply for its uniqueness, but I’ve found there to be a bit of truth to its ergonomic differences to a standard QWERTY keyboard. Wrist pain previously experienced while typing has disappeared because the ErgoDox let’s me type with my arms, wrists, and hands in more natural resting positions. The novelty is cool in its own right, though. It has yet to get old for someone new to walk by my desk at work and ask, “Do you really type on that thing?” Maybe it will eventually, but I hope not :)
Conclusion
I love typing on my ErgoDox. It’s a satisfying experience being able to use something at work every day that I assembled and tested myself. The ErgoDox certainly is a different beast from a normal keyboard, but I would recommend it to anyone who may be considering a more ergonomic keyboard. Feel free to contact me if you have any questions about the ErgoDox or mechanical keyboards in general. Until then, type on friends.